How to Customize the Settings for Auto Spell Check in Excel
- Author: Excel Tips and Tricks from Pryor.com
- Categories:
- Tags:
- Share on:
While working in Excel, you may want to change which AutoCorrect / AutoFormat alerts you see (and don’t see) in the creation process. Luckily, you can customize the spelling and grammar checker by selecting specific options to employ (or not) as Excel checks your cell data.
Customize Spellcheck Settings
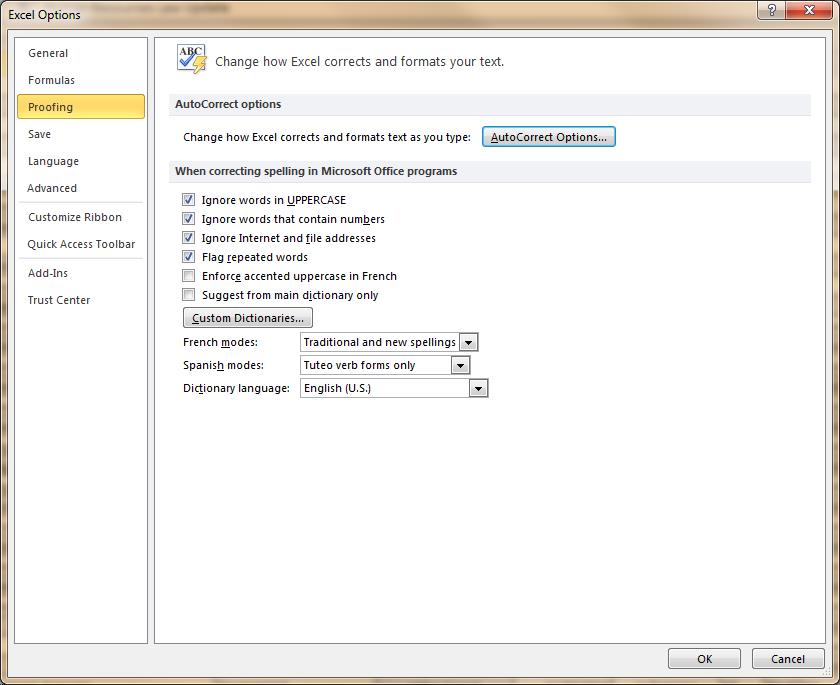
- Click the File tab.
- Click the Options button to launch the Options dialog box.
- Click the Proofing tab.
- Basic grammar options are found in the When correcting spelling in Microsoft Office Programs section. These apply to all Office applications, such as Word, Excel and PowerPoint.
- To set options for Excel only, review options in the Change how Excel corrects and formats text as you type section by launching the AutoCorrect Options… window:
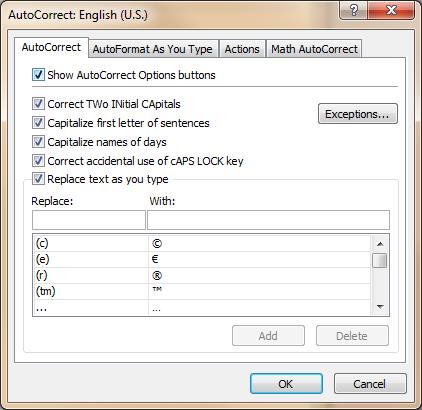
- Correct Two Initial CApitals: If the shift key holds and you type two capital letters as part of a longer word, this corrects to just one capital.
- Capitalize first letter of sentences: Automatically capitalize the first word in a sentence as you input text in a cell.
- Capitalize names of days: Automatically corrects proper days of the week with a capital first letter.
- Correct accidental use of cAPS LOCK key: If you attempt to type regularly with the caps lock on, Excel will detect this as an error and correct it.
- Replace text as you type: Allows you to designate specific corrections.
- Replace: Choose a shorthand or common error to be corrected
- With: Type out how you’d like that corresponding shorthand or common error to appear instead.
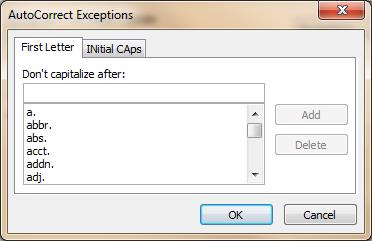
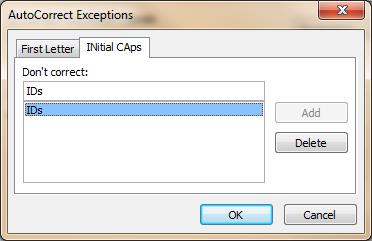
NOTE: The Exceptions button opens the AutoCorrect Exceptions window. This window allows you to select exceptions for any active workbook. You can add or delete specific examples from this window.
Choose a Seminar and Save $10
Microsoft® Excel® 2013: Beyond the Basics
1 Day
- CEU: 0.6
- CPE: 6
Team Training - Virtual or In-person
Microsoft® Excel® Basics
1 Day
- CEU: 0.6
- CPE: 6
- PDU: 6
Virtual Seminars:
-
Apr 23
-
Apr 24
-
Apr 29
-
+ 37 more dates
